Linking Main Stations in the CCM
Main Stations to be linked in the CCM should first be connected by LAN to the same network and able to see each other.
In order to create a Link-Group in the CCM, you must designate one unit as Link-Leader. The other units are designated Link-Member and are joined to the Leader via the Leader’s IP address. This is achieved in the Linking page of each unit.
-
From a browser, access the CCM of HelixNet Main Station #1 by typing its IP address into the URL field.
Note: The unit’s IP address can be found in the device’s display screens: Menu > Networking > Preferences > IP address. For username and password see CCM password.
Note: The Link-Leader IP must be statically allocated to prevent loss of service.
-
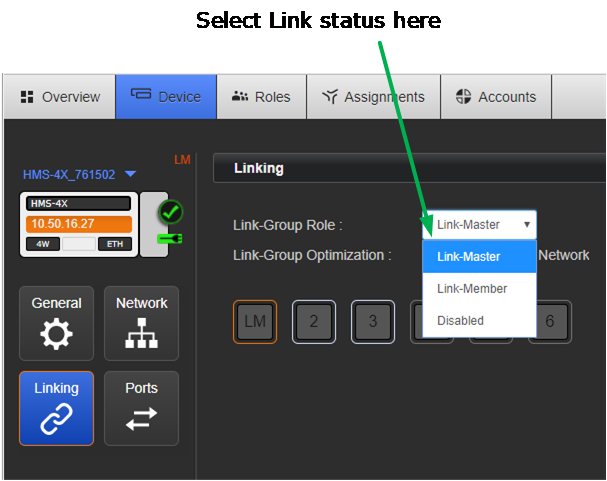
Navigate to Home > Linking in the CCM. From the drop-down box select Link-Leader and click Apply Changes. This designates this unit as Link-Leader.
Note: The default linking mode is: Link Disabled. When a device has been designated either Link Leader or Link Member it will be looking for a pairing and a link icon will flash in the device screens. Linking Disabled prevents this.
-
From a new browser window, access the CCM of device #2 by typing the unit’s IP address into the URL field.
You will have to enter the username and password for the device.
Navigate to Home > Linking and select Link-Member from the drop down box.
-
You will be prompted for the IP address (or hostname) of the Link-Leader. Within the Leader IP address field, enter the IP address of device #1. Click on blue check mark or <ENTER> key to submit.
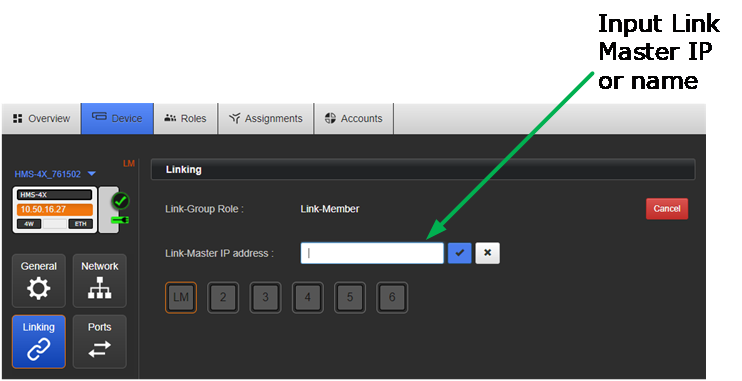
Either accept the default Link Group Member ID (orange highlight) or select a new one by clicking on it. Click Apply Changes. This links this device to the Link Leader.
-
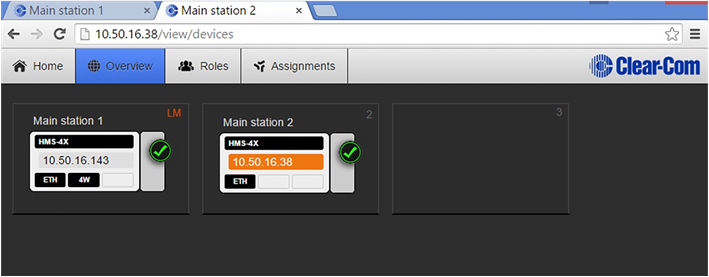
Navigate to the Overview page (top navigation bar). Both HelixNet devices are now displayed on this page.
-
Repeat steps 3) to 6) for a third device if required.