We'd value your feedback. Click here...
Creating a HelixNet/LQ Link-Group
-
To access the HelixNet Core Configuration Manager, enter the IP address of the HelixNet Main Station, as displayed on the front panel, into the address field of your browser. If the unit is reachable over your network, this will take you to the Overview page of the CCM that is served by the unit.
Note: For CCM username and password see CCM password.
-
Ensure the HelixNet device is set to Link-Master in the CCM of the Main Station. Navigate to Device/Linking/Link-Group Role.
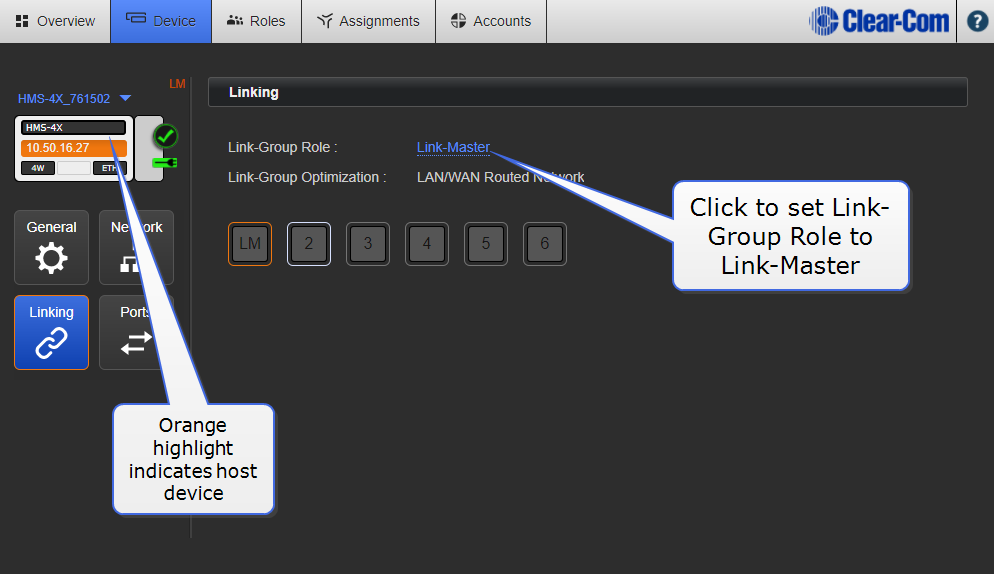
Note: Default Link-Group Role for an HMS is Disabled.
Note: The host device is the device your browser is currently pointing to.
-
To access the LQ CCM, enter the IP address of the LQ device, as displayed on the front panel, into the address field of your browser. If the unit is reachable over your network, this will take you to the Overview page of the CCM that is served by the unit.
-
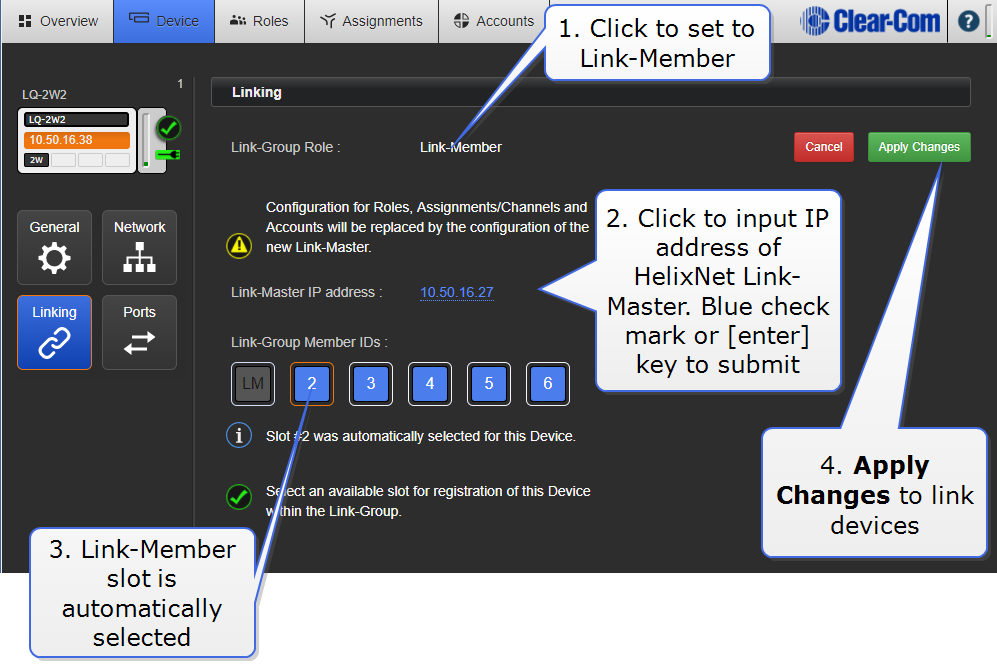
Set Link-Group Role of LQ unit to Link-Member. Navigate to Device/Linking/Link-Group Role.
-
Enter the Link-Master IP address.
-
For each device to be added to the Link-Group, input the device IP into the browser’s address field to access the CCM, designate the device as Link-Member and give it the Link-Master IP address (this links the device to the group).
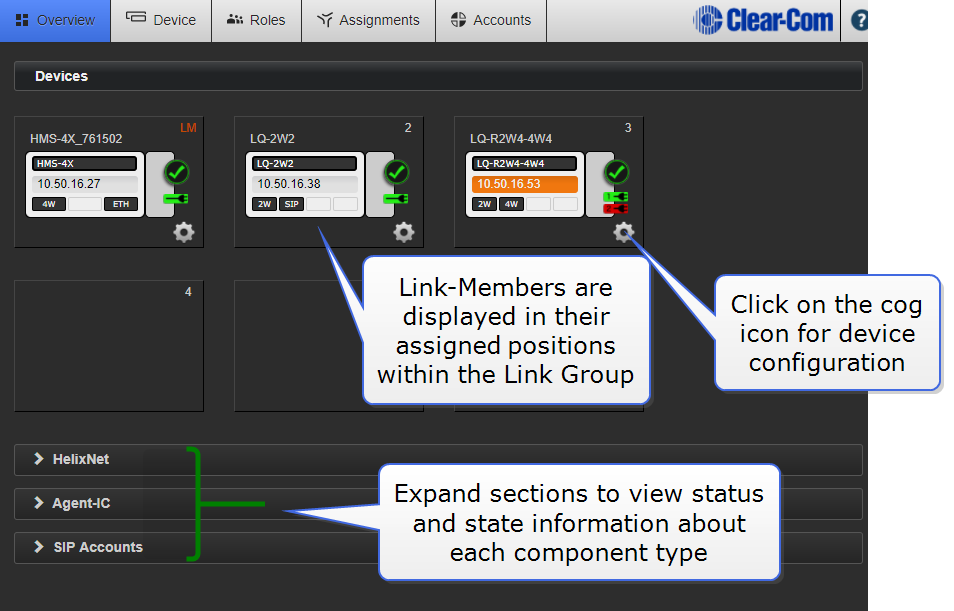
Note: Once you have linked the members to the master, all devices in the Link-Group will be visible in the Overview page of the CCM.
-
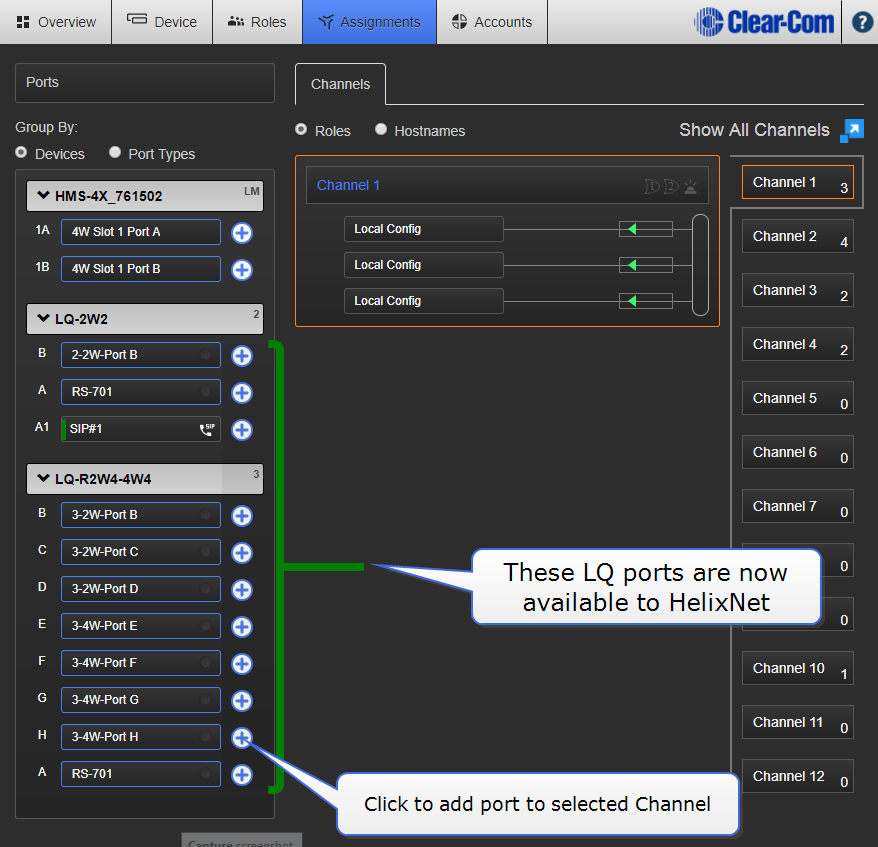
Navigate to the Assignments page to create, configure and view how audio is routed throughout the system. All ports on the LQ units will now be visible and available for assignment into one or more channels.