Basic set up

Setting up your LQ environment within a LAN
Gather the following equipment:
- 2 x LQ units (LQ #1 and LQ #2)
- 2 x provided Power Supply Units (PSUs)
- 2 x Straight-through RJ45 Ethernet cables
- 1 x Network connection with Dynamic Host Control Protocol (DHCP) server present (preferred method)
- 2 x 2-wire, 4-wire and/or GPIO equipment to provide an audio connection to each LQ
- 2 x 2 Network connections available for connecting each LQ to your network.
- Connect either LAN port of LQ #1 to the local network equipment.
- Connect either LAN port of LQ #2 to the local network equipment.
-
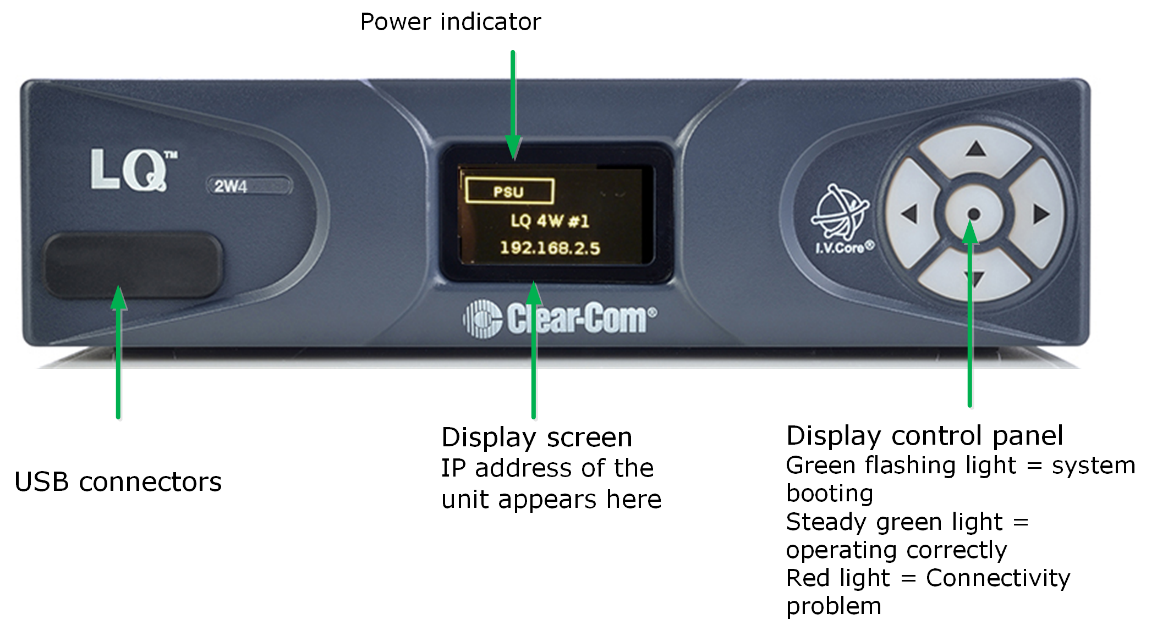
Connect the provided PSU to each LQ device. Once booted, each device will display an IP address on the front panel display.
- Once the devices are operational, you will program each device through the browser-based Core Configuration Manager (CCM).
-
Access the CCM. From a device connected to your network, open a Web browser. Enter the IP address as displayed on LQ #2 device in the address field of the Web browser (Chrome, Safari, Firefox, IE, Opera). This takes you to the CCM.
-
For details of the CCM username and password see The CCM Password

| Note: | The IP address will be allocated by DHCP (default mode). In the event that the network does not serve DHCP or there is no network connection, the IP address will revert to a link-local address. If necessary IP addresses for the devices can be configured in the Network page of the CCM. See information links at the bottom of this page if you require more information. |
-
Connect the audio equipment to Port A of each LQ device.
- Once the LQ devices are set up, proceed to Creating a Link-Group.

For more information see: