How to Set Up an HTTPS Connection between a Browser and an LQ Unit
Install a security certificate on your browser
- Choose a security certificate. See Certification Authority (CA) options for use with LQ units in this chapter for more information.
- Open the CCM of your LQ unit.
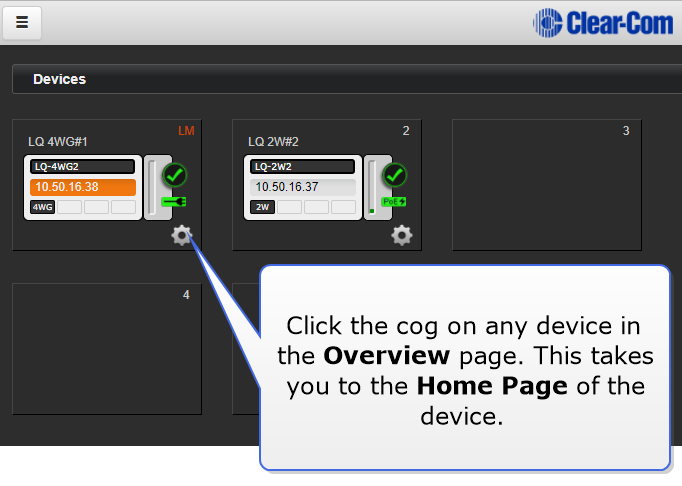
- Navigate to Device>Network>Security.
- Install the certificate. The three certificate options are covered below, choose a., b., or c.
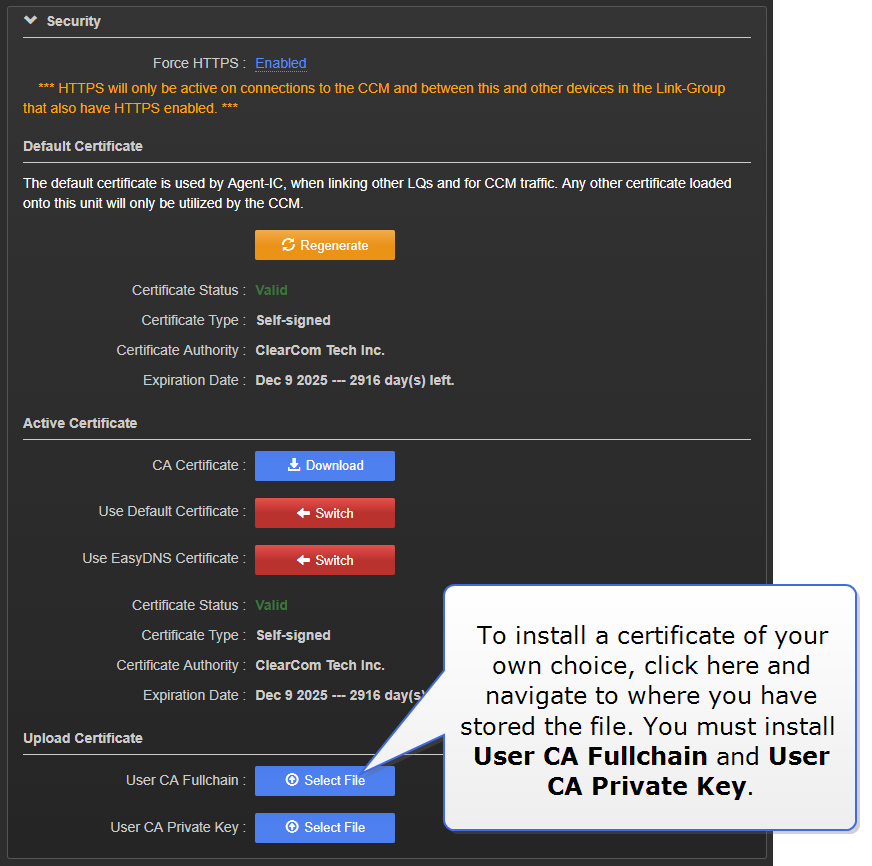
- A certificate of your own choosing:
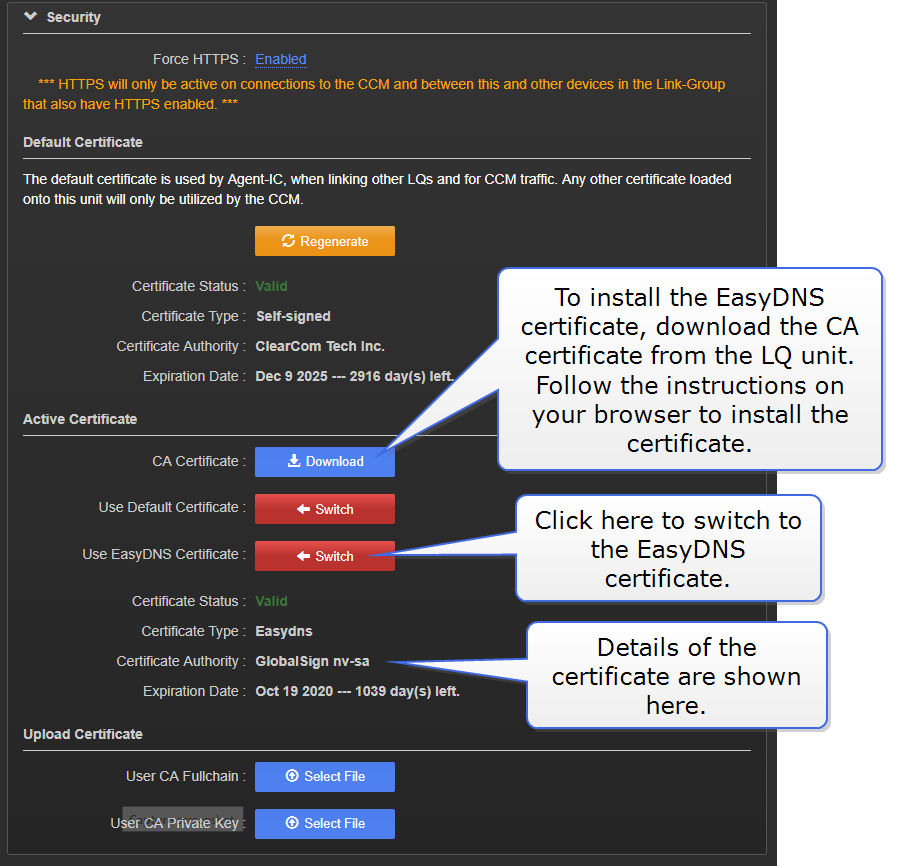
- The EasyDNS certificate:
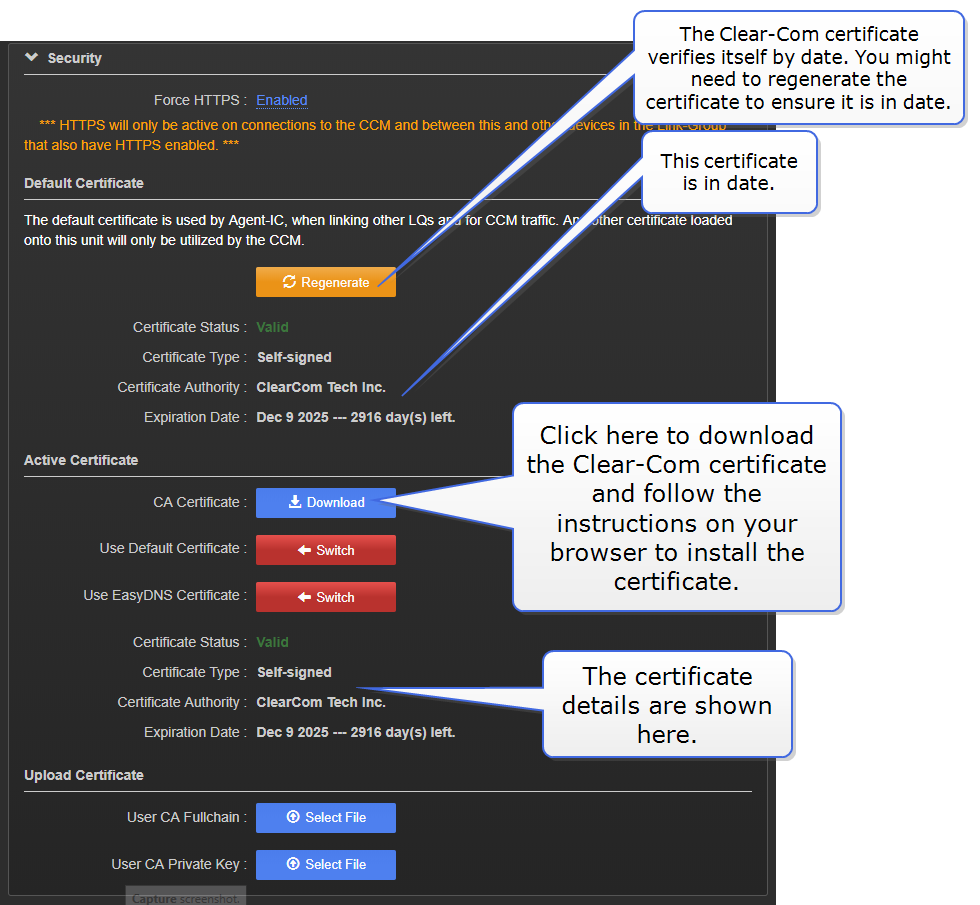
- The Clear-Com self-signed (default) certificate:
- A certificate of your own choosing:
- Test the certificate by typing the HTTPS IP address into your browser URL field in the format: HTTPS:// XX.XX.XX.XX :
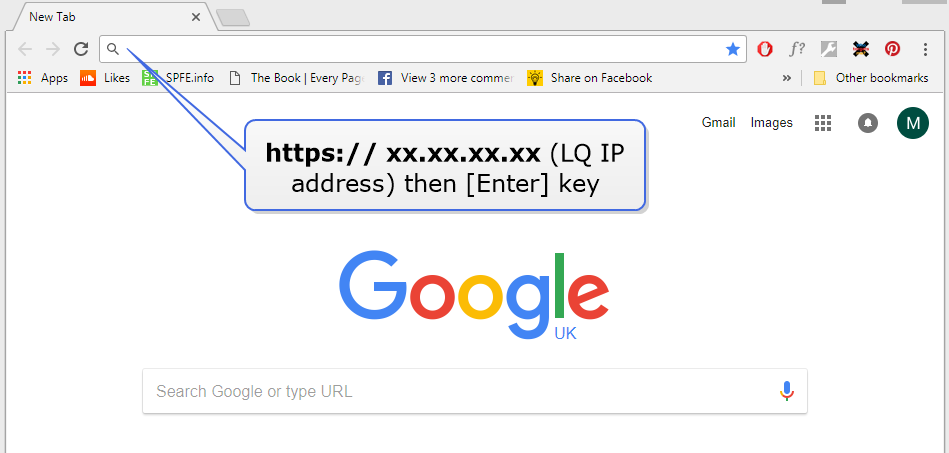 If you see the green 'secure' symbol and the browser does not issue an exception, the certificate is working.
| Note: | When using your own certificate or the EasyDNS certificate, the LQ unit must first be registered with a DNS server. If required, your network administration department should provide advice on this. When using the Clear-Com default certificate, the device does not need to be registered with a DNS server. The Clear-Com default certificate can be used with a set up that does not have Internet access. |
| Note: | Different browsers (for instance, Chrome, Firefox) have different methods for handling certification. This is beyond the control of Clear-Com. You may need to refer to the instructions that come with your browser for this. |
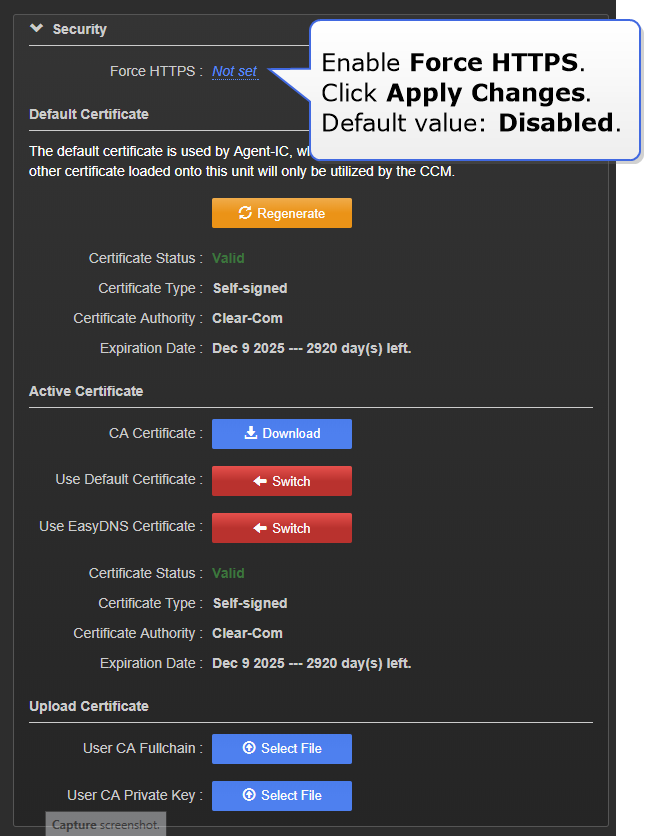
Enable the Force HTTPS feature on your LQ unit
- Navigate to the Security section in the Networking page.
-
Enable the Force HTTPS feature. Click Apply Changes.
- If you are working with a Link-Group, enable the Force HTTPS feature on each device in the Link-Group.