Offline Activation of Additional Licenses
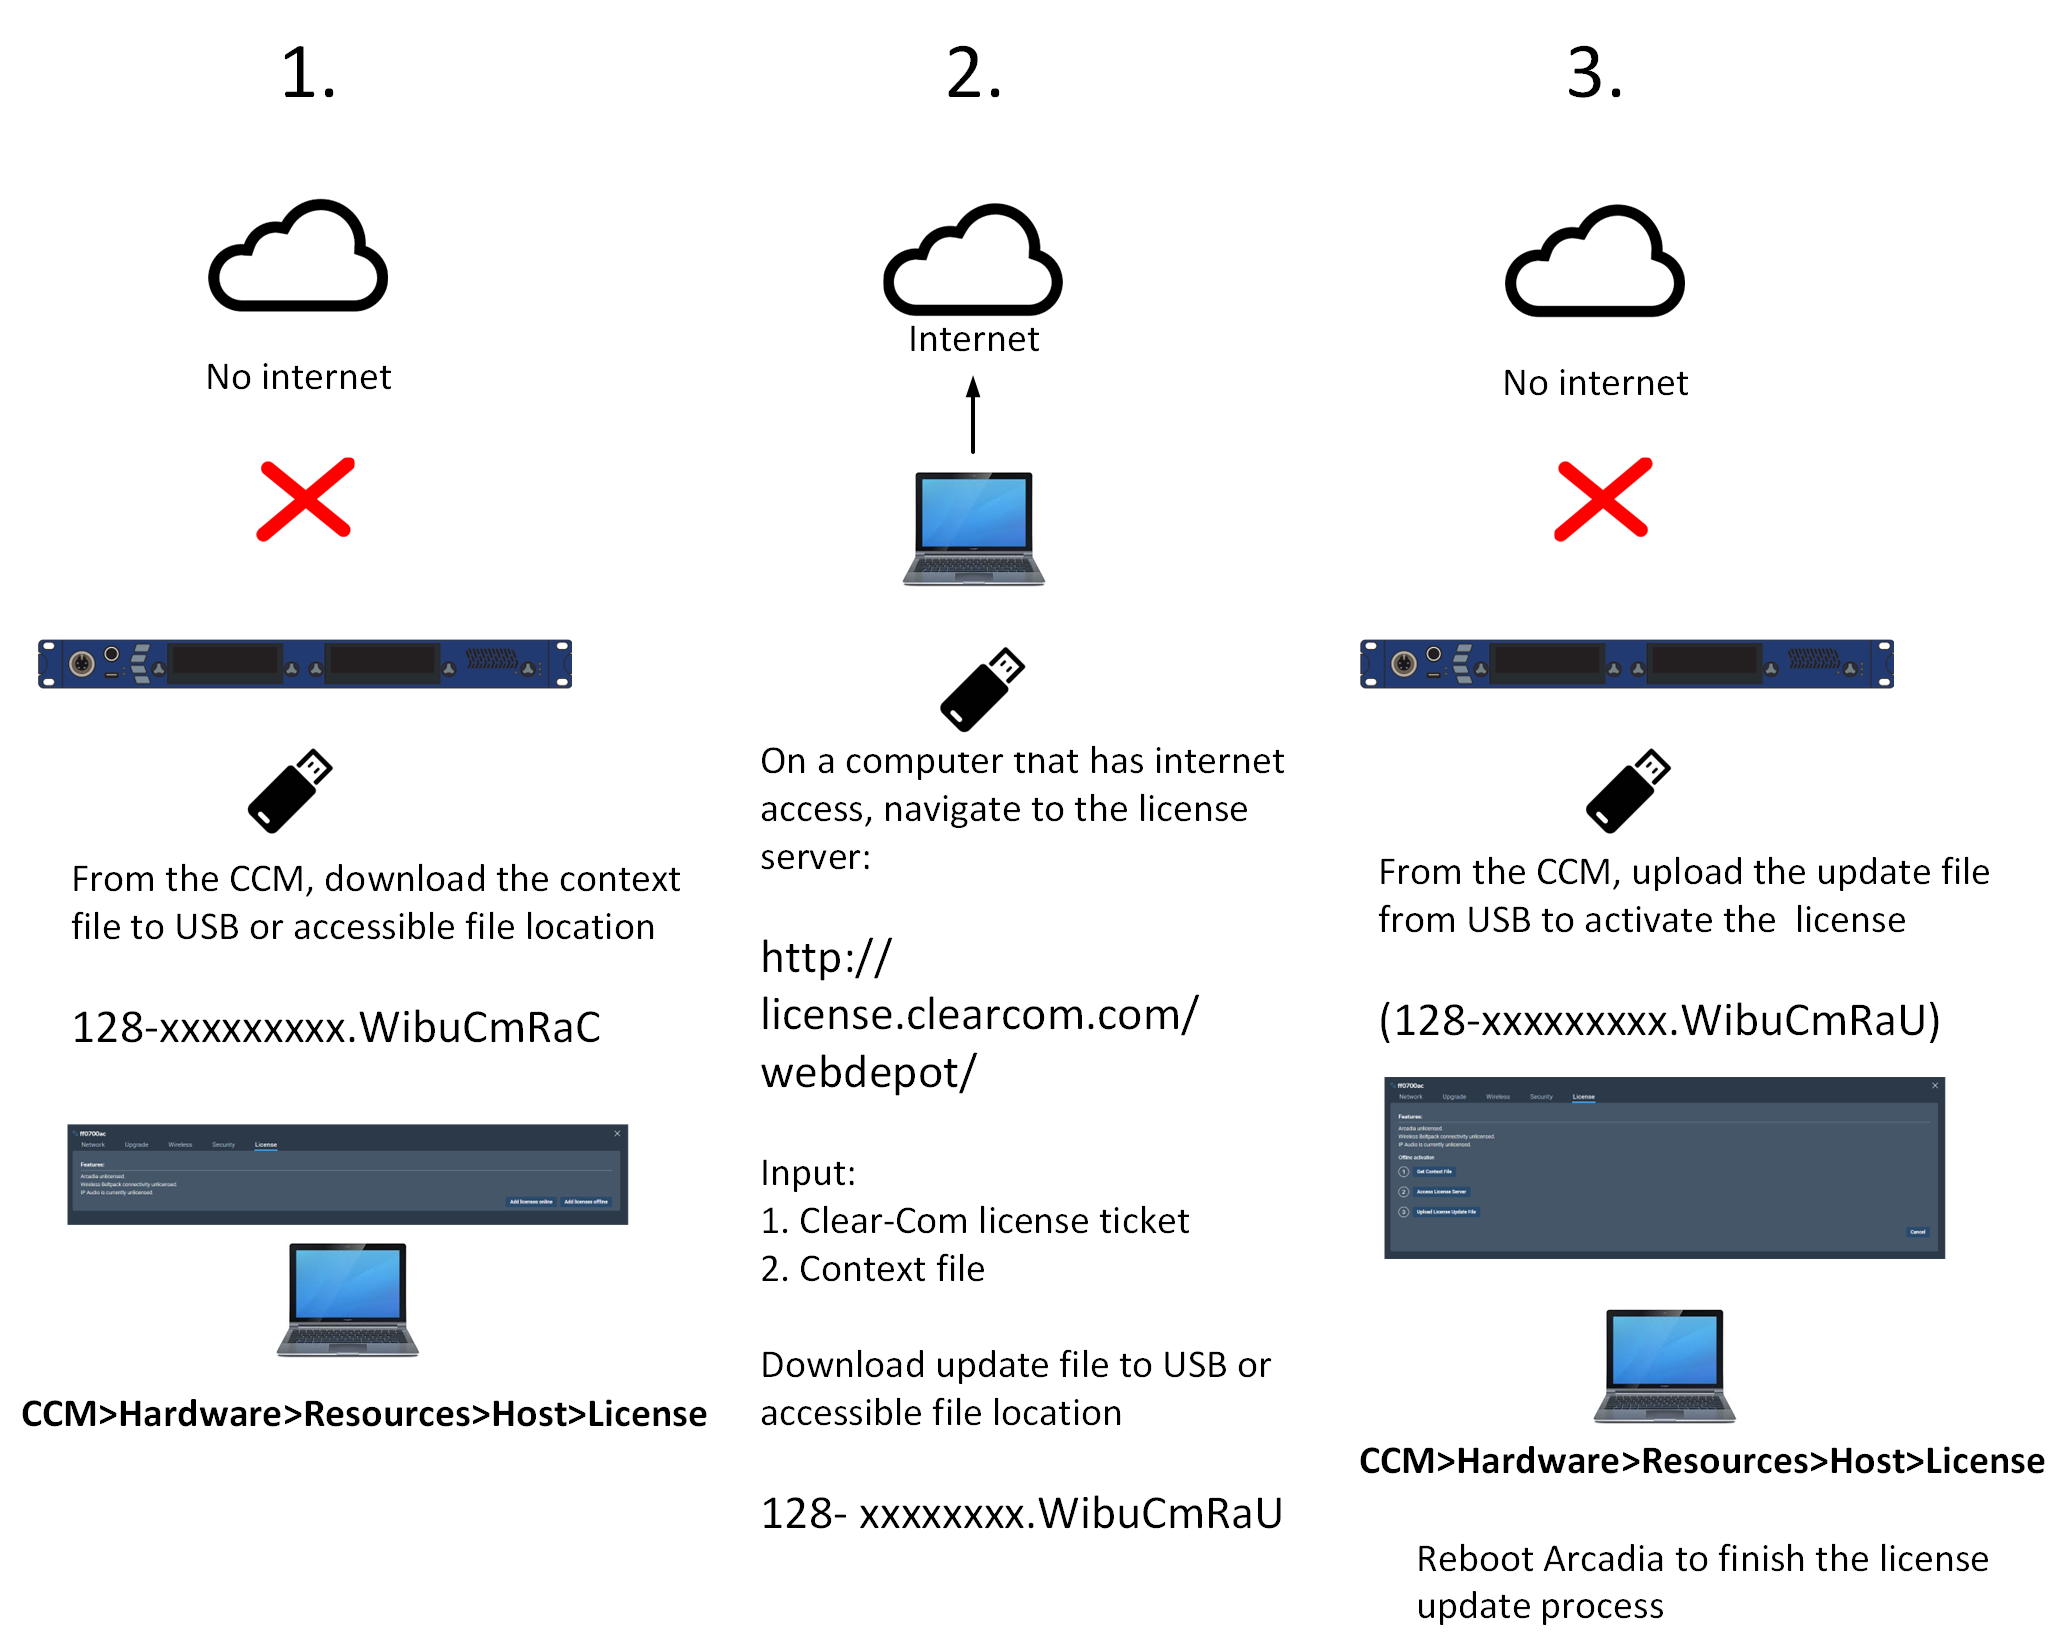
For detailed steps see below.
Navigate to Hardware > Resources > Host > License, and select Add licenses offline.
Select Get Context File.
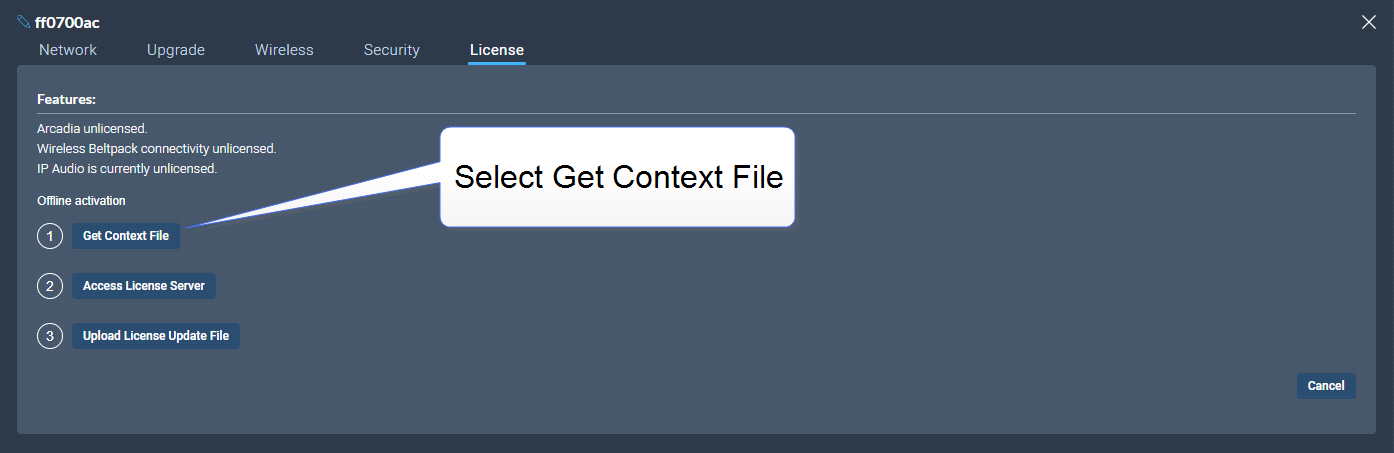
The context file downloads locally.
Use another PC which has internet access and connect a browser to http://license.clearcom.com/webdepot/. As you will download the licenses into the previously downloaded context file (step 2) you need the context file on the new PC.
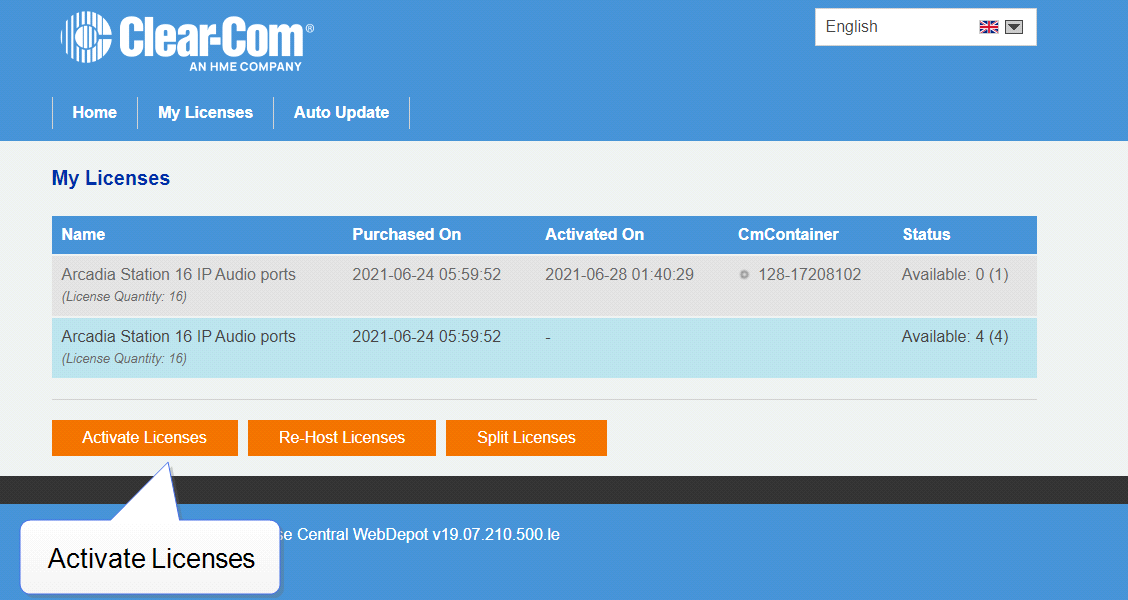
You will see the online license server. Enter your Clear-Com ticket number, and then Click Next.
The licenses on your ticket are displayed on the screen. Select Activate Licenses.
Select the left-hand option.
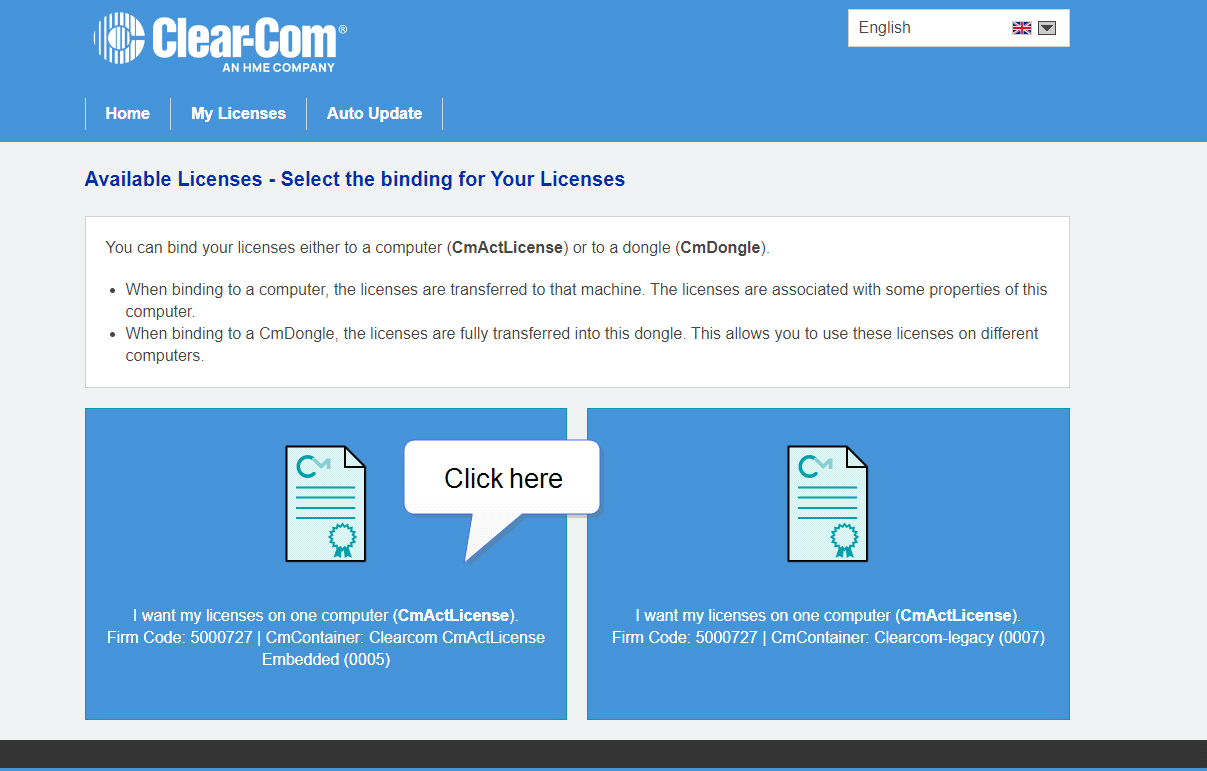
Click File-based license transfer.
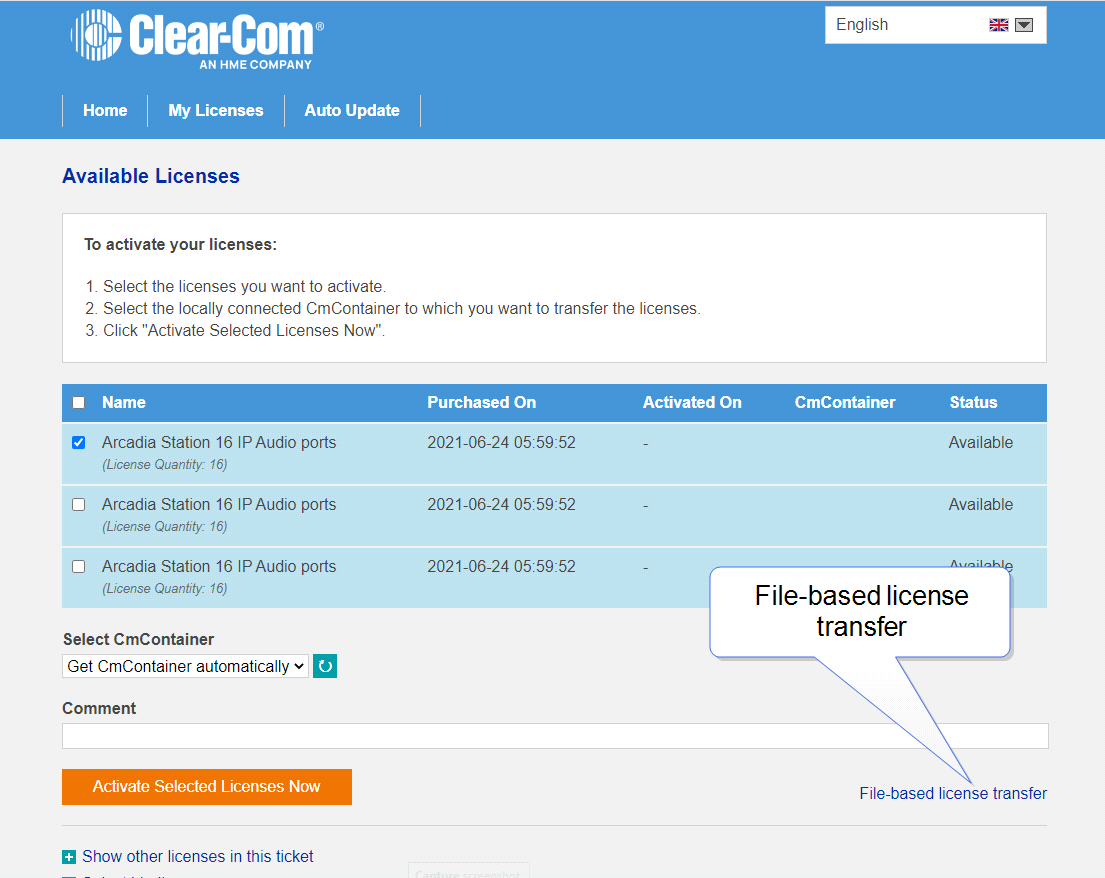
Select the required license(s). Click Choose File and navigate to the context file (downloaded in step 2). Select it. Then click Start Activation Now.

Download the License Update File
Do not Upload Receipt Now. Instead, return to the CCM and select Upload License Update File.
Navigate to where you have stored the downloaded file from Step 9 (128- xxxxxxxx.WibuCmRaU). Select the file. The license will upload.
You must reboot the Station before the licenses take effect. In the CCM, navigate to Status > Overview > Host Device and select Reboot.
Once the licenses are activated, you will be able to see how many licenses you have in the Hardware > Resources page under Licensed Ports. You can also see licensed features on the Hosts panel in the same page.
